Sprite Process
I had to take a some time to do commissions work. Though I wish I could get a better sense of how many words I've progressed, but because there's code also scattered in it if should count towards a "total"? On one hand, it's words I did type. On the other hand, the end user isn't going to see the same total when they're playing through.
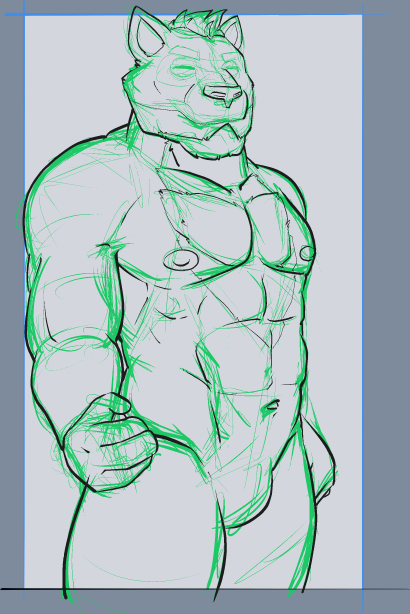 |  |  |
| For this Devlog, I wanted to talk about how I do sprites.
I use Clip Studio Paint (CSP). My workflow utilizes the Vector Tools heavily. Specifically all the inks. The sketch is in green from the Change Color Layer option in the Layers Panel. Which also gets used later down the road. I use a frame to help inform me roughly where this particular sprite stands in comparison to the other sprites. I usually try to work on a not 100% White background because it hurts my eyes after a while. I'm terrible at remembering to give my eyes regular breaks. I'll ink the whole body. No geni's get put into the sprite, that can be added later if needed, but I plan to draw CGs for any scenes that require them. |
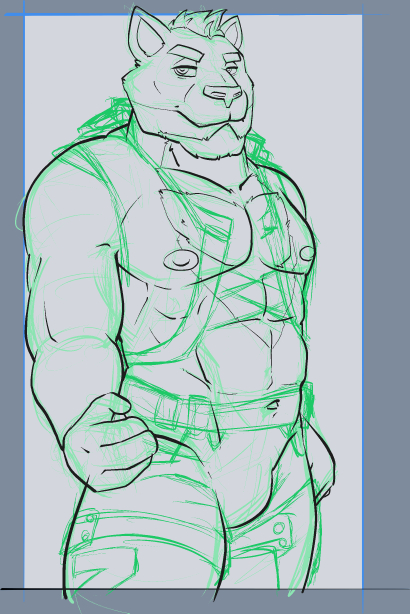
The Face--which for me, includes the Eyes, Brows, Mouth--gets its own layer. As this is the most dynamic part of the sprite, having it on its own layer will allow for swapping the expressions as needed. Time permitting, I would love to do more than a singular pose, body language is important to me.
Another thing that's important to me, consistency. In the crop, there are notes. Notes for which Brush I use, the size of the Brush, and what magnification level I ink at. Just to ensure consistency. With the inks down it's a good time to think about the clothing. I keep my Sketch Layers in their own folder together and try to avoid drawing directly on the previous sketch in case I need to nuke the outfit sketch and try again. | Vector Tools make it incredibly easy to Fill in the colors. Set the Ink Layer or the folder of Ink Layers to the Reference Layer (It's the lighthouse icon) and then you're able to use the Enclose and Fill Tool. It lets you lasso an area and whatever is inside will fill with your selected color.
I usually have to adjust the Close Gap and Area Scaling sometimes but it makes super short work of filling in the colors, and I'll set it on transparent to cut away gaps. It is an extremely powerful tool to have on top of the other many amazing things Vectors can do... which there's more to come. Once again, the Facial Features are colored on their own layer. Now I'll organize everything I currently have into a folder for the inks and the colors. And on a new folder + new vector layer I'll get into inking the clothing. |
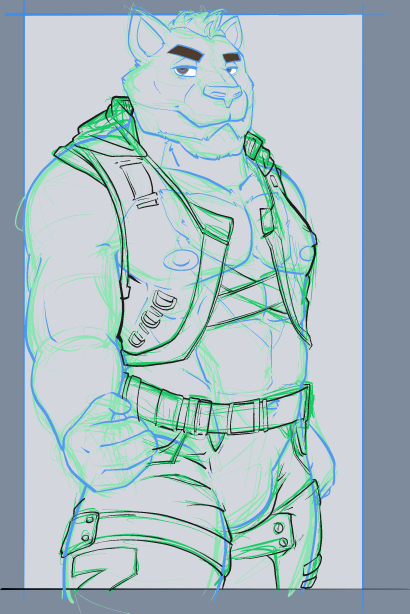 | 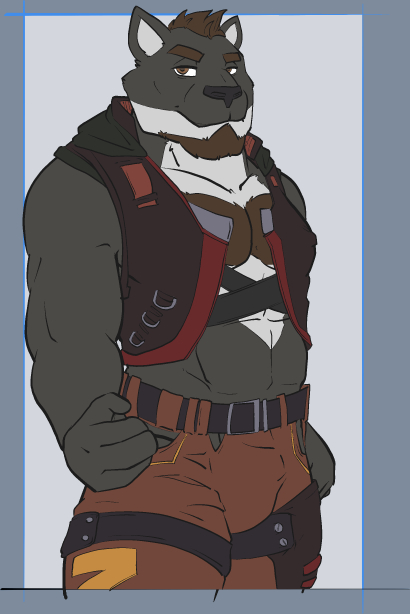 |
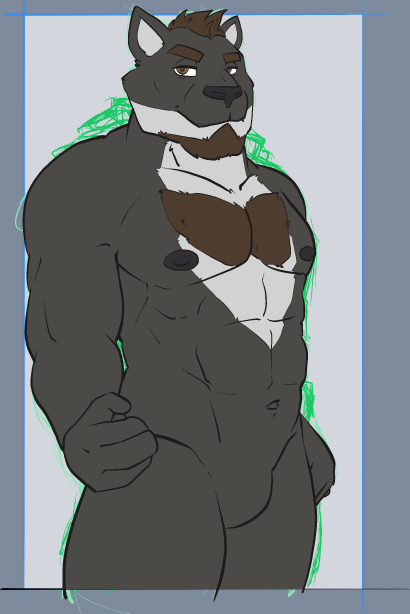
| I'll change the 'Main Inks' with the Change Color Layer option to help me figure out the different parts of the body versus what I'm inking on. Secondarily, having the inks be Vectors lets me copy and paste individual lines between layers and just hack off the excess. And the advantage of that is that it's the exact same line weight and doesn't produce any artifacts. And when they are a different color due to the Change Color layer, pasting them into my working Vector Layer reverts them back to their original color. Magic. | Again, I end up using the Enclose and Fill Tool a lot for this section which is just filling in the rest of the clothing layers. Y'all, Fashion is hard. The folks who do it are probably professionals and should be part of some industry of some sort. I do try to color code what I think are going to be of similar material or serve similar purposes. And try to have general breaks of color. But this is what it looks like all put together. I'll touch it up here and there, and for the most part this is complete. |
Is this the best way of doing this? Probably not. It's a method that works out pretty well for me. The writing is coming along, and a handful of CGs are lined up. If you've made it all the way through all of that, thank you for checking out my project. I'm looking at having a cameo spot for Act 2, I'll probably announce it in the New Year.
Leave a comment
Log in with itch.io to leave a comment.